Tuesday, September 16, 2014

Case'ing the Stampin'Up! Catalog #1 - Flower Patch Thank You Card

Hello everyone!  I hope that you are all getting back to your normal routines now that school is back in session.  I know in our house it has taken a couple of weeks to figure things out, but I am hopeful to keep things on track.

Today I have something a little different and my VERY FIRST VIDEO tutorial.  The annual catalog has so much inspiration, but I haven't built up the sort of inventory to create every project displayed, so I thought it might be fun to try and re-create some of the projects with supplies I do have.  This is the card I created using the flower patch stamp set and will be the first in a series of videos/cards showing how you can use the catalogs for inspiration in your own projects.

This is the picture from the catalog used as my inspiration.  This project used the Bordering Blooms Stamp Set on page 162 of the Annual Catalog.


You can click on the link below to watch my very first Start to Finish video tutorial.


Listed below are the dimensions and supplies used to create this card.  Please click on the links provide to order any supplies you may need.  Thanks for stopping by and I hope you like my video.  This will be an ongoing series and I hope you will come back to check out them out.

Measurements:
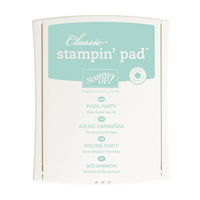
Pool Party CS - 4 1/4 x 11 (score at 5 1/2 for Standard A2 Card)
Whisper White CS - 2 pieces cut at 4 x 5 1/4

Thanks for stopping by and until next time...

Cindy

Friday, August 29, 2014

Fun Friday...Halloween Treat Holders and Crafting with Kids

Happy Friday!  As promised, I have a 3D project for you.  It has been a crazy week around here.  Kids go back to school on Tuesday and we have been getting ready this week.  Can I tell you if I don't see the mall for another 6 months it will be too soon.  However, with the holiday's around the corner I know I won't be so lucky.  Anyway, the holiday catalog went live yesterday and I am so excited that these products are now available for everyone.  This catalog has to be one of my favorites.  I am not a huge Halloween fan, but I love Thanksgiving and Christmas.  So my first instinct was to start creating Christmas projects (I will admit, I did create a Christmas project first, but I won't post it until later).  I am stepping out of my comfort zone and starting with Halloween.

As I was trying to decide what to do with this box (I will have an upcoming video on how to create this box), my son was hovering asking if he could help.  I don't usually craft while they are around for many reasons, but typically I need to be undisturbed and free to create without having to tend to the typical mommy issues.  Anyway, rather than sending him away, I thought it would be nice to let him sit with me and help.  So while my samples might have a few smudges or be a little off center, it is a memory with my son that we will both have for years to come.

Stampin'Up Fall Fest Candy Popper

Stampin'Up! Fall Fest Goodie Box

Stampin'Up Fall Fest Stamp Set
The box opens like a pizza box and measures 3 3/4 x 3 x 1.5.  Nice size box for a handful of goodies.  The candy popper was made with the envelope punch board and measures 6 x 1.  Both use the Flower Pot DSP and the pumpkins from the new Fall Fest Stamp Set which I stamped in Pumpkin Pie and Mossy Meadow Ink.  The Sentiment is from the Delightful Dozen Stamp Set.

I hope you will give these a try, all the supplies I used are listed below and can be ordered by clicking on the images.  Thanks for stopping by and hope you come again.  Until next time...

Cindy
Tuesday, August 26, 2014

Blackberry Bliss Texture

I have been wanting to try this technique for a while.  A very hot trend is using texture paste, embossing paste, or what I have used, modeling paste.  I think they all have slightly different uses and properties.  I happened to find this flexible modeling paste at my local big box craft store.

There are several ways to use this product.  I chose to color the paste with my Blackberry Bliss ink (one of my favorite of all the colors).  I grabbed a piece of plastic, applied my ink pad directly to the plastic, took a dollop of the paste and mixed into the ink with a palette knife (I used a cheap one that came with my daughter's paint kit).  After mixing the paste and ink, I applied a thin coating to my card base which was taped to my work surface with the Dots Stencil taped on top.  The key is to make sure you get good coverage but only leave a very thin layer.  Remove the stencil and immediately wash it along with your tools to keep it from causing any damage to your stencil.  It easily washed off with soap and water, then left it to air dry. I let the card sit for about 10 min to dry while I was cleaning up my work surface and tools and then for good measure zapped it briefly with my heat gun to make sure it was good and dry.  I wish I could capture on camera the texture that this paste gave the dots...when you run your fingers across the dots if feels almost like velvet.  SO COOL!  To finish off the card I took a 1" strip of Black cardstock, my Chalk Talk Stamp Set and coordinating framelits and circle punch and this card was DONE!  I love the color and feel of this card.  Very basic design, but the texture was a hit for me.  I don't think I would recommend this technique as a one layer card unless you are using watercolor paper as the paste seems to have a bit of liquid in it and tends to warp the Whisper White cardstock.  If layering, no problem, enough adhesive or dimensionals will straighten it right out.  I have linked all the supplies I used below.  And the Liquitex Flexible Light Modeling Paste I used can be found at any of the big box craft stores.  I hope  you will give this technique a try, it really is a very cool effect.

Thanks for stopping by and hope you come back soon.  Until next time....

Cindy



Friday, August 22, 2014

Sweet Stuff - Clean and Simple

Happy Friday!

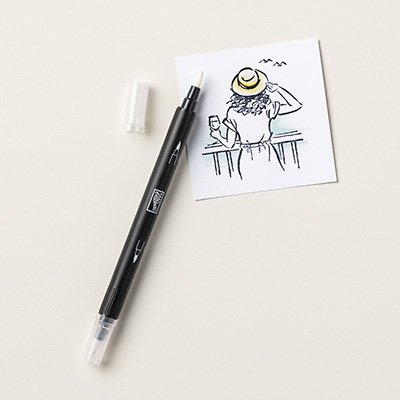
Do you remember when you were a kid and wanted to color?  Wednesday's card created this feeling in me so today's samples feature another technique in coloring.  I used the Stampin'Up! Blender Pen and ink to create this set of Lunch Box Notes and card.
Stampin'Up! Sweet Stuff Lunch Box Notes
Stampin'Up! Sweet Stuff
I used the Sweet Stuff Stamp set to create these and can I tell you, I LOVE THEM!  This set it so fun and EASY to color and a great set to create this little note cards to stick in the kids lunches.  My kids are getting older (faster than I am ready to accept), but they still like getting a little something in their lunch boxes to remind them I am thinking of them.  I hope you will give this set a try if you are a coloring enthusiast.  All the supplies are listed below and can be purchased by clicking on the links.
Thanks for stopping by and hope you find your way back soon.  Next week I will have some 3D items appearing on the blog so be sure to check it out.

Until next time...

Cindy